From programs select Administrative Tools. Then select DHCP. In DHCP window you will find your computer name under DHCP. Just click your computer then click Action Menu.
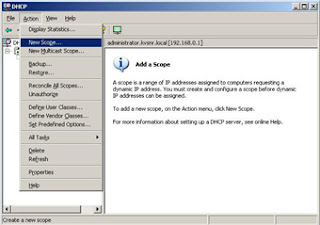
Then click New Scope. Then click next. Type a name and description for this scope.
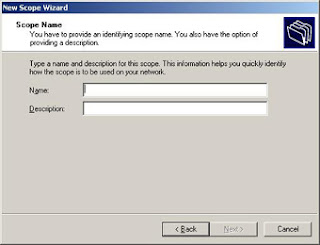
Give those details and click next. It will ask IP Address range like this.

Enter those details then click next. It will ask Excluded address range. Give those details then click next. Now enter the lease duration details then click next. Now select YES I want to configure these option now. Then click next. Enter your default Gateway then click add then click next.
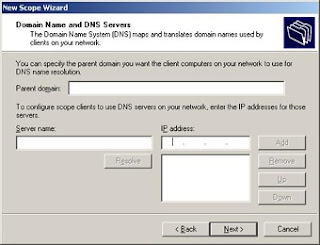
Enter your Domain name in Parent Domain box. Then enter IP Addresses of DNS Servers on your network. After adding IP Addresses of DNS Servers click next. Now enter your Wins Server IP Address(You can give the same server IP Address) then click Add. Then click next. Then select I want to activate this scope now. Then click next. Click Finish.
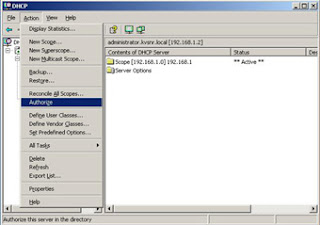
Next you have to authorize the Server by clicking Action Menu of DHCP then by selecting Authorize like this.
Now under DHCP you will observe Server options. Just click it. On the right side you will find 006 DNS Servers. Double click it. Now enter IP Addresses of your DNS Servers in IP Addresses box then click Add. After adding all IP Addresses of DNS Servers then click APPLY then O.K.
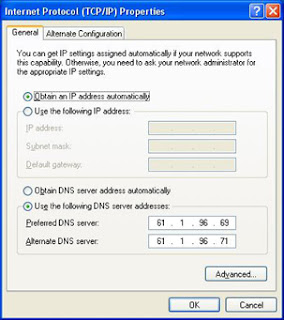
Configure Windows XP client to Windows 2003 DHCP Server:
Right click My Network Places then click properties. Now right click Local Area Connection then click Properties. Double click TCP/IP. Then select Obtain an IP address automatically like this.
Then click O.K. Again click O.K. Now this client computer will get IP Address,Subnetmask & Gateway from the DHCP Server.
You can view the configuration by using the command Ipconfig/all like this. Click start button then click RUN. Now type CMD in open box then click O.K. You will get Command Prompt window. Then at C:\> just type Ipconfig/all then press enter,you will get all configuration details.
No comments:
Post a Comment